Apache xuất hiện từ năm 2006 và hiện đang là webserver được sử dụng nhiều nhất trên thế giới, tiếp theo đó là vị trí số #2 thuộc về Nginx. Mỗi webserver có ưu điểm riêng, Apache với khả năng xử lý mạnh mẽ còn Nginx có tốc độ vượt trội, đặc biệt với những file tĩnh.
Mặc dù hiện tại chúng ta có thể thay thế hoàn toàn Nginx cho Apache, tuy nhiên vì một số lí do nên nhiều người vẫn bắt buộc phải dùng Apache. Và giải pháp tối ưu lúc này đó là sử dụng Nginx làm Reverse Proxy cho Apache.
Lúc này, Nginx đóng vai trò làm front end xử lý các file tĩnh, còn Apache làm back end xử lý dynamic content.
Contents
1. Cài đặt Apache
Nếu VPS chưa được cài đặt Apache thì bạn dùng lệnh sau để cài đặt:
yum install httpd httpd-devel
2. Cấu hình Reverse Proxy
– Chỉnh cổng mặc định 80 của Apache thành 8080
nano /etc/httpd/conf/httpd.conf
Tìm dòng Listen 80 và thay bằng Listen 8080
– Sau đó, di chuyển đến cuối file và dán những dòng sau vào để tạo mới một virtual host:
NameVirtualHost *:8080

<VirtualHost *:8080>
   ServerName example.com
   ServerAlias www.example.com
   DocumentRoot /var/www/html
       <Directory "/var/www/html">
               Options FollowSymLinks -Includes
               AllowOverride All
               Order allow,deny
               Allow from all
       </Directory>
       RewriteEngine on
</VirtualHost>
– Lưu lại file cấu hình và khởi động
service httpd restart
3. Cài đặt Nginx
yum install epel-release
– Cài đặt Nginx
yum install nginx
4. Cấu hình Reverse Proxy trên Nginx
– Tạo Nginx virtual host
nano /etc/nginx/conf.d/example.com.conf
với nội dung như bên dưới:
server {
   listen 80;
   server_name example.com;
   access_log off;
   error_log off;

   location / {
      client_max_body_size 10m;
      client_body_buffer_size 128k;

      proxy_send_timeout 90;
      proxy_read_timeout 90;
      proxy_buffer_size 128k;
      proxy_buffers 4 256k;
      proxy_busy_buffers_size 256k;
      proxy_temp_file_write_size 256k;
      proxy_connect_timeout 30s;

      proxy_redirect http://www.example.com:8080 http://www.example.com;
      proxy_redirect http://example.com:8080 http://example.com;

      proxy_pass http://127.0.0.1:8080/;

      proxy_set_header Host $host;
      proxy_set_header X-Real-IP $remote_addr;
      proxy_set_header X-Forwarded-For $proxy_add_x_forwarded_for;
   }

   # Select files to be deserved by nginx
   location ~* ^.+\.(jpg|jpeg|gif|css|png|js|ico|txt|srt|swf|zip|rar|html|htm|pdf)$ {
      root /var/www/html;
      expires 30d; # caching, expire after 30 days
   }
}
– Kiểm tra và khởi động lại Nginx
nginx -t
service nginx restart
5. Cài đặt module Reverse Proxy And Forward
Để Apache có thể hiểu được traffic đang đến từ đâu, chúng ta cần cài thêm module rpaf (Reverse Proxy And Forward). rpaf sẽ nhận X-Forwarded-For header từ proxy server và điều chỉnh lại remote address của client.
Cài đặt httpd-devel và gcc để compile source:
yum install httpd-devel gcc
Tải về mod_rpaf. Xem phiên bản mới nhất ở đây.
wget http://mirror.trouble-free.net/sources/mod_rpaf-0.6.tar.gz
tar zxvf mod_rpaf-0.6.tar.gz
cd mod_rpaf-0.6
apxs -i -c -n mod_rpaf-2.0.so mod_rpaf-2.0.c
Link dự phòng: https://hocvps.com/wp-content/uploads/2015/05/mod_rpaf-0.6.tar.gz
Nếu thành công bạn sẽ thấy thông báo như sau:
Tiếp theo bạn hãy tạo file cấu hình cho mod_rpaf
nano /etc/httpd/conf.d/mod_rpaf.conf
Với nội dung như sau (chú ý thay 1.2.3.4 bằng IP server của bạn):
LoadModule rpaf_module modules/mod_rpaf-2.0.so

# mod_rpaf Configuration

RPAFenable On
RPAFsethostname On
RPAFproxy_ips 1.2.3.4
RPAFheader X-Forwarded-For
Cuối cùng khởi động lại Apache là xong
service httpd restart
6. Kiểm tra kết quả
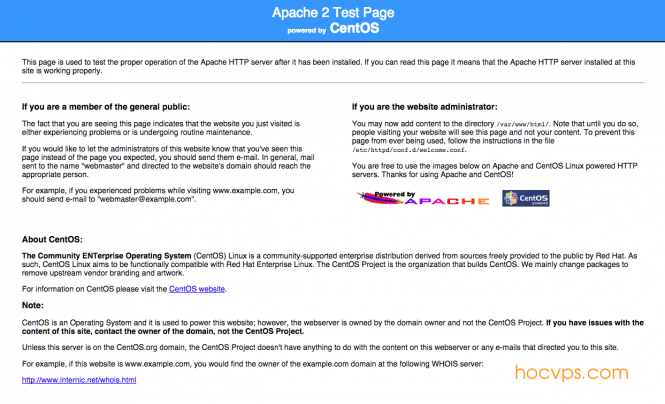
– Nếu cài đặt thành công, khi truy cập vào domain example.com chúng ta sẽ thấy trang mặc định của Apache
– Và test phpinfo (cần cài đặt PHP trước, tham khảo hướng dẫn cài LAMP)
nano /var/www/html/info.php

//Paste đoạn sau vào
<?php phpinfo(); ?>
Như vậy là xong rồi đó, công việc tiếp theo của chúng ta là thực hiện tối ưu cho webserver Apache và Nginx; cài đặt thêm module cần thiết khác.
Nguồn tham khảo : hocvps.com


